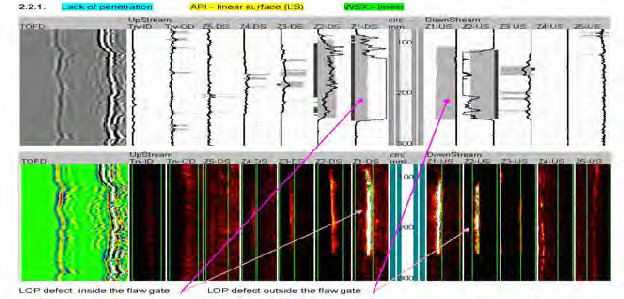
- AUT offers a better inspection solution with lower reject rates than radiography.
- Faster inspections (100 mm/sec), Low operating costs, High reliability, and Repeatability.
- Weld-to-weld inspection time of less than four minutes for a 36-inch diameter pipeline.
- Pipe wall thickness from 6 mm to 50 mm.
- No radiation hazard or harmful chemicals usage, enabling Safer and Greener inspection without interfering with production.
- No inspection equipment required inside the pipe such as RT crawler, eNo Crawler inside the pipe, enabling easy access to welds from outside for complete inspection.
- Better detection of most critical defects especially planar defects such as lack of Fusion (LOF) and Lack of Penetration (LOP)
- Instant test results enable better process control of welding, giving lower rejects.
- Digitized archiving of weld scans, enables reviewing of results anytime anywhere.
- Rapid and reliable data interpretation using Strip chart A-Scan display, TOFD (B-Scan) display for defect confirmation, Mapping (C-Scan) display for volumetric defects and Geometric reflections.
- Accurate flaw sizing in through wall direction, an essential component required for ECA (not practical with Radiography).
- Rapid and reliable data interpretation using Strip chart A-Scan display, TOFD (B-Scan) display for defect confirmation, Mapping (C-Scan) display for volumetric defects and Geometric reflections.
- Acceptable to Pipeline construction codes such as DNV-OS-F101 (Submarine Pipeline Systems), API 1104 (Welding of Pipelines), etc. in lieu of Radiography.
- Conformance to ASTM Standard E-1961 (Mechanized UT for Girth welds)


